How Do I SSH Into Pi Over The Internet Using? Unlock The Power Of Remote Access
So, you're wondering how do I SSH into Pi over the internet using, right? Let's be real here—SSHing into your Raspberry Pi from anywhere on the globe is like giving yourself superpowers. Imagine controlling your tiny little Pi from across the world, managing servers, or even setting up a media center while lounging on a beach. Sounds cool, doesn’t it? Well, buckle up because we’re diving deep into this game-changing tech. Whether you're a tech enthusiast, a hobbyist, or just someone who loves tinkering with gadgets, this guide will walk you through every step of the process. And trust me, it’s not as scary as it sounds.
Before we dive in, let’s address the elephant in the room—why does SSH even matter? SSH, or Secure Shell, is your golden ticket to securely accessing your Pi remotely. It's like a secret handshake that lets you connect to your device without anyone snooping around. Plus, it’s super useful for running scripts, managing files, or even troubleshooting issues when you're miles away from your hardware. So, if you’re ready to level up your Pi game, let’s get started.
Now, here’s the deal: while SSHing into your Pi might sound intimidating at first, it’s actually pretty straightforward once you break it down. In this guide, we’ll cover everything from setting up your Pi for remote access to troubleshooting common issues. By the end of this, you’ll be a pro at SSHing like a boss. So, grab a coffee, and let’s make some magic happen!
- Why Y Moviescc Is The Goto Spot For Movie Enthusiasts
- 123movie Cc Your Ultimate Guide To Streaming Movies Online
What Is SSH and Why Should You Care?
Alright, let’s start with the basics. SSH stands for Secure Shell, and it’s basically a protocol that allows you to access your Pi’s terminal securely over the internet. Think of it as a secure tunnel that lets you communicate with your device without worrying about hackers or prying eyes. And trust me, in today’s world of cyber threats, security is king. SSH encrypts all your data, making it nearly impossible for anyone to intercept your commands or sensitive info.
Here’s why SSH is so awesome:
- It’s super secure, thanks to encryption.
- You can access your Pi from anywhere in the world.
- It’s lightweight and doesn’t hog your system resources.
- Perfect for running scripts, managing files, or even setting up a home server.
Now, if you’re still wondering why you should care about SSH, here’s a fun fact: it’s one of the most widely used protocols for remote access. From big corporations to tiny home projects, SSH is everywhere. And once you master it, you’ll wonder how you ever lived without it.
- Myflixervc The Ultimate Streaming Hub For Movie Buffs
- Xmoviesws Your Ultimate Destination For Movie Streaming
Setting Up SSH on Your Raspberry Pi
Alright, now that we’ve covered the basics, let’s talk about setting up SSH on your Pi. This is where the magic happens, folks. Don’t worry—it’s easier than you think. First things first, you’ll need to enable SSH on your Pi. If you’re using Raspberry Pi OS, this is a breeze. Just head over to the Raspberry Pi Configuration tool, navigate to the Interfaces tab, and enable SSH. Boom! Done.
But wait, there’s more. If you’re using an older version of Raspberry Pi OS, you might need to manually enable SSH by creating a file called "ssh" (without any extension) in the boot partition. Sounds complicated? It’s not. Just pop open your file manager, navigate to the boot partition, and create a blank file named "ssh". That’s it. Your Pi will automatically enable SSH on the next boot.
How Do I SSH Into Pi Over the Internet Using a Static IP?
Now, here’s where things get interesting. To SSH into your Pi over the internet, you’ll need to assign it a static IP address. Why? Because dynamic IP addresses can change, and that makes it a pain to connect remotely. Assigning a static IP ensures that your Pi always has the same address, making it easier to connect. Plus, it’s just good practice.
Here’s how you do it:
- Open the terminal on your Pi.
- Type in
sudo nano /etc/dhcpcd.confto edit the DHCP configuration file. - Add the following lines at the end of the file:
- interface eth0
- static ip_address=192.168.1.100/24
- static routers=192.168.1.1
- static domain_name_servers=192.168.1.1
- Save the file and reboot your Pi.
And just like that, your Pi now has a static IP address. Easy peasy, right?
Port Forwarding: The Key to Remote Access
Alright, let’s talk about port forwarding. This is where things get a little tricky, but don’t worry—I’ve got you covered. Port forwarding is basically the process of telling your router which device to send incoming SSH requests to. Without it, your router won’t know where to send the traffic, and you won’t be able to connect to your Pi.
Here’s how you set it up:
- Log in to your router’s admin interface. Usually, this is something like 192.168.1.1 or 192.168.0.1.
- Find the port forwarding section. This might be labeled differently depending on your router, but it’s usually under Advanced Settings or Security.
- Create a new rule and set the following:
- Service Name: SSH
- External Port: 22
- Internal IP Address: Your Pi’s static IP
- Internal Port: 22
- Save the rule and restart your router.
And just like that, your router now knows to forward incoming SSH requests to your Pi. Pretty cool, huh?
What If Port Forwarding Doesn’t Work?
Now, if you’re having trouble with port forwarding, don’t panic. There are a few common issues that might be causing the problem. First, double-check that your router supports port forwarding. Some older routers might not have this feature. Second, make sure your firewall isn’t blocking the port. And finally, ensure that your Pi’s SSH service is running. You can check this by typing sudo service ssh status in the terminal.
If all else fails, you might want to consider using a third-party service like ngrok or PageKite. These services create a secure tunnel to your Pi without requiring port forwarding. But more on that later.
Using a Dynamic DNS Service
So, here’s the deal: even with a static IP, your public IP address might change from time to time. That’s where dynamic DNS (DDNS) comes in. DDNS services automatically update your domain name to point to your current IP address, ensuring that you can always connect to your Pi no matter what.
Here are some popular DDNS services you can use:
- No-IP
- DuckDNS
- Dynu
Setting up DDNS is pretty straightforward. Just sign up for a free account, create a hostname, and install the DDNS client on your Pi. The client will automatically update your domain name whenever your IP address changes. It’s like having a personal assistant for your Pi.
How to Set Up DuckDNS on Your Pi
Let’s walk through setting up DuckDNS on your Pi. It’s super easy and only takes a few minutes.
- Head over to DuckDNS and sign up for a free account using your Google or GitHub credentials.
- Create a new domain name. This will be the address you use to connect to your Pi.
- SSH into your Pi and run the following commands:
sudo apt-get updatesudo apt-get install curlcurl https://www.duckdns.org/install.sh | bash
- Follow the on-screen instructions to complete the setup.
And just like that, you’ve got a DDNS service running on your Pi. Now you can connect to it using your custom domain name instead of an IP address. How cool is that?
Securing Your SSH Connection
Alright, now that we’ve got everything set up, let’s talk about security. SSH is secure by default, but there are a few things you can do to make it even more bulletproof.
Here are some tips:
- Change the default SSH port from 22 to something less obvious. This makes it harder for hackers to find your Pi.
- Disable root login. Allowing root access over SSH is a big no-no. Instead, create a regular user account and use that for SSH.
- Use SSH keys instead of passwords. SSH keys are much more secure and harder to brute-force.
- Install a firewall and only allow SSH traffic from trusted IPs.
These simple steps can go a long way in protecting your Pi from unwanted visitors. And trust me, in today’s world, security is everything.
How to Set Up SSH Keys
Let’s walk through setting up SSH keys. It’s a bit more involved than using passwords, but it’s well worth the effort.
- On your local machine, run
ssh-keygento generate a new key pair. - Follow the prompts to save the key and set a passphrase (optional).
- Copy the public key to your Pi using
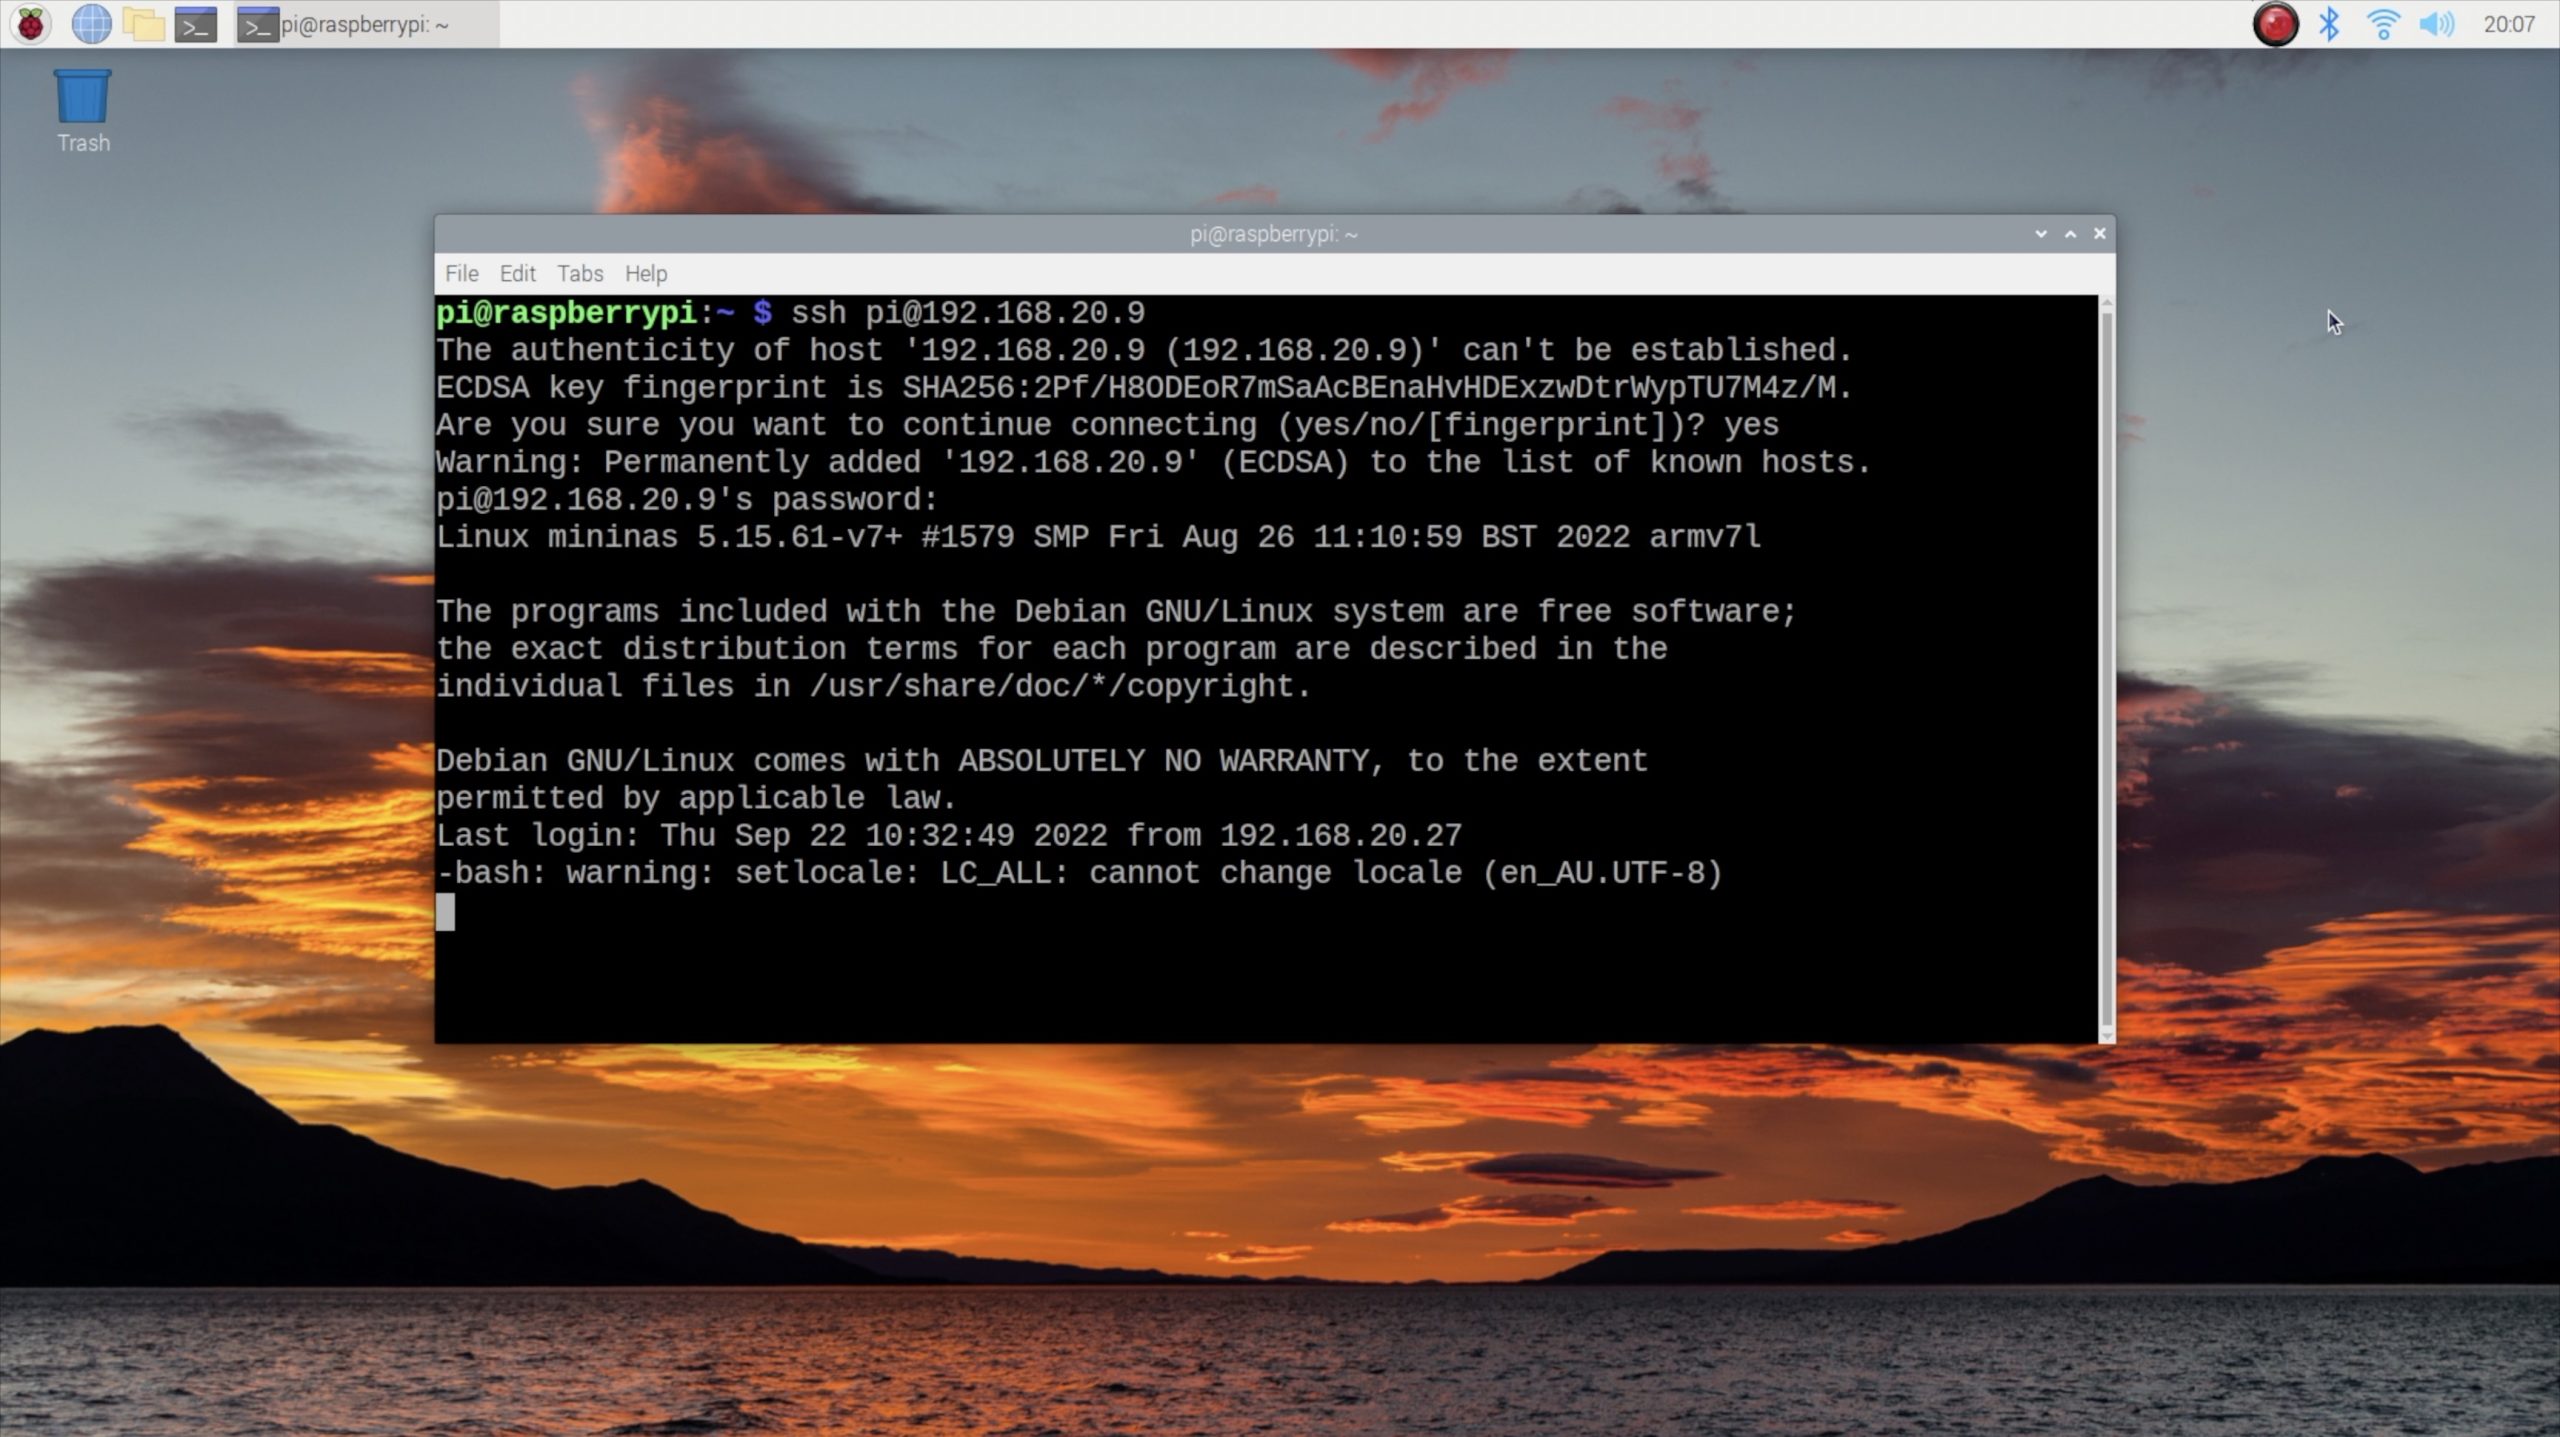
ssh-copy-id pi@your-pi-address. - Test the connection by running
ssh pi@your-pi-address. If everything is set up correctly, you should be able to log in without entering a password.
And just like that, you’ve got SSH keys set up. Now you can sleep easy knowing your Pi is secure.
Troubleshooting Common Issues
Alright, let’s talk about troubleshooting. Even the best-laid plans can go awry, and SSH is no exception. Here are some common issues you might encounter and how to fix them.
Issue 1: Can’t Connect to Pi
- Make sure SSH is enabled on your Pi.
- Check that port forwarding is set up correctly.
- Verify that your firewall isn’t blocking the port.
Issue 2: Connection Drops Randomly
- Check your internet connection.
- Ensure that your Pi’s power supply is stable.
- Try increasing the SSH timeout settings.
Issue 3: Permission Denied (Public Key)
- Make sure your public key is correctly copied to the Pi.
- Check the permissions on the ~/.ssh directory and authorized_keys file.
- Try regenerating your SSH keys.
These are just a few of the common issues you might encounter. But with a little troubleshooting, you should be able to get everything up and running in no time.
When All Else Fails
If you’re still having trouble, don’t despair. There are plenty of resources out there to help you. Check out the official Raspberry Pi forums, Stack Overflow, or even Reddit. Chances are, someone else has encountered the same issue and found a solution.
Advanced Tips and Tricks
Now that you’ve got the basics down, let’s talk about some advanced tips and tricks to take your SSH game to the next level.
Tip 1: Use SSH Tunnels
- SSH tunnels allow you to securely access other services running on your Pi, like a web server or database.
- Just use the
-Loption when connecting to create a local port that forwards traffic to your Pi.
Tip 2: Automate SSH Connections
- Use tools like autossh to automatically reconnect if your SSH session drops.
- Set up cron jobs to run scripts on your Pi without needing to manually SSH in.
Tip 3: Use SSH Config Files
- Create a config file
- Unveiling The Hidden Gems Of Movieweb Instances Your Ultimate Streaming Companion
- Bflixti Your Ultimate Streaming Destination Unveiled
SSH Into Pi Zero The DIY Life

How to SSH into Raspberry Pi for Remote Access on Windows
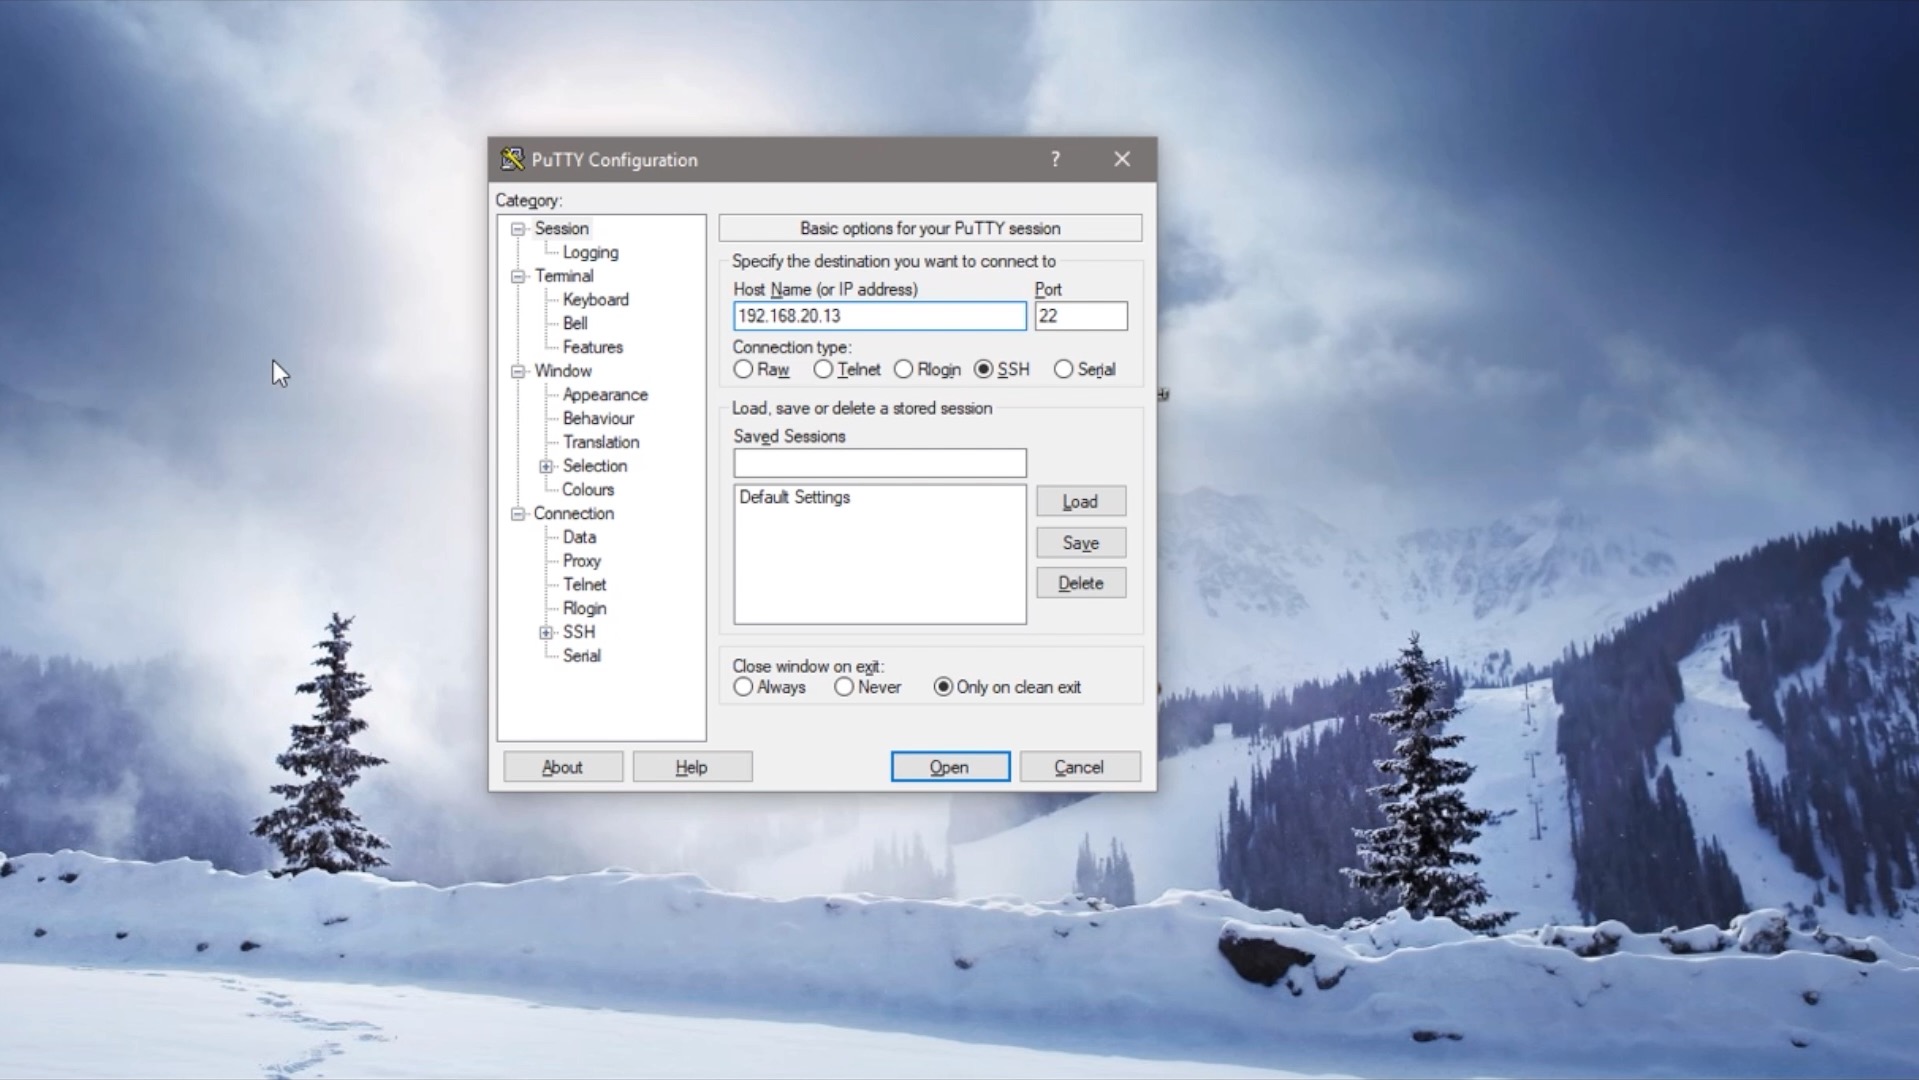
Putty to SSH Into Pi The DIY Life
